Choose what syncs
Outcome: Only the reMarkable content you turn on will be eligible to sync to OneNote.
Before you begin
Section titled “Before you begin”- Connect your Microsoft account.
- Choose a OneNote destination.
- Wait for ReMarkSync to load the local reMarkable library.
Select your content
Section titled “Select your content”- At Choose what syncs, expand a folder or notebook with the arrow next to its name.
- Select the control next to each folder, notebook, PDF, or page you want to sync.
- Use All only if you want every syncable page. Use None to clear the current selection.
- Review the selected-page count at the top of the list.
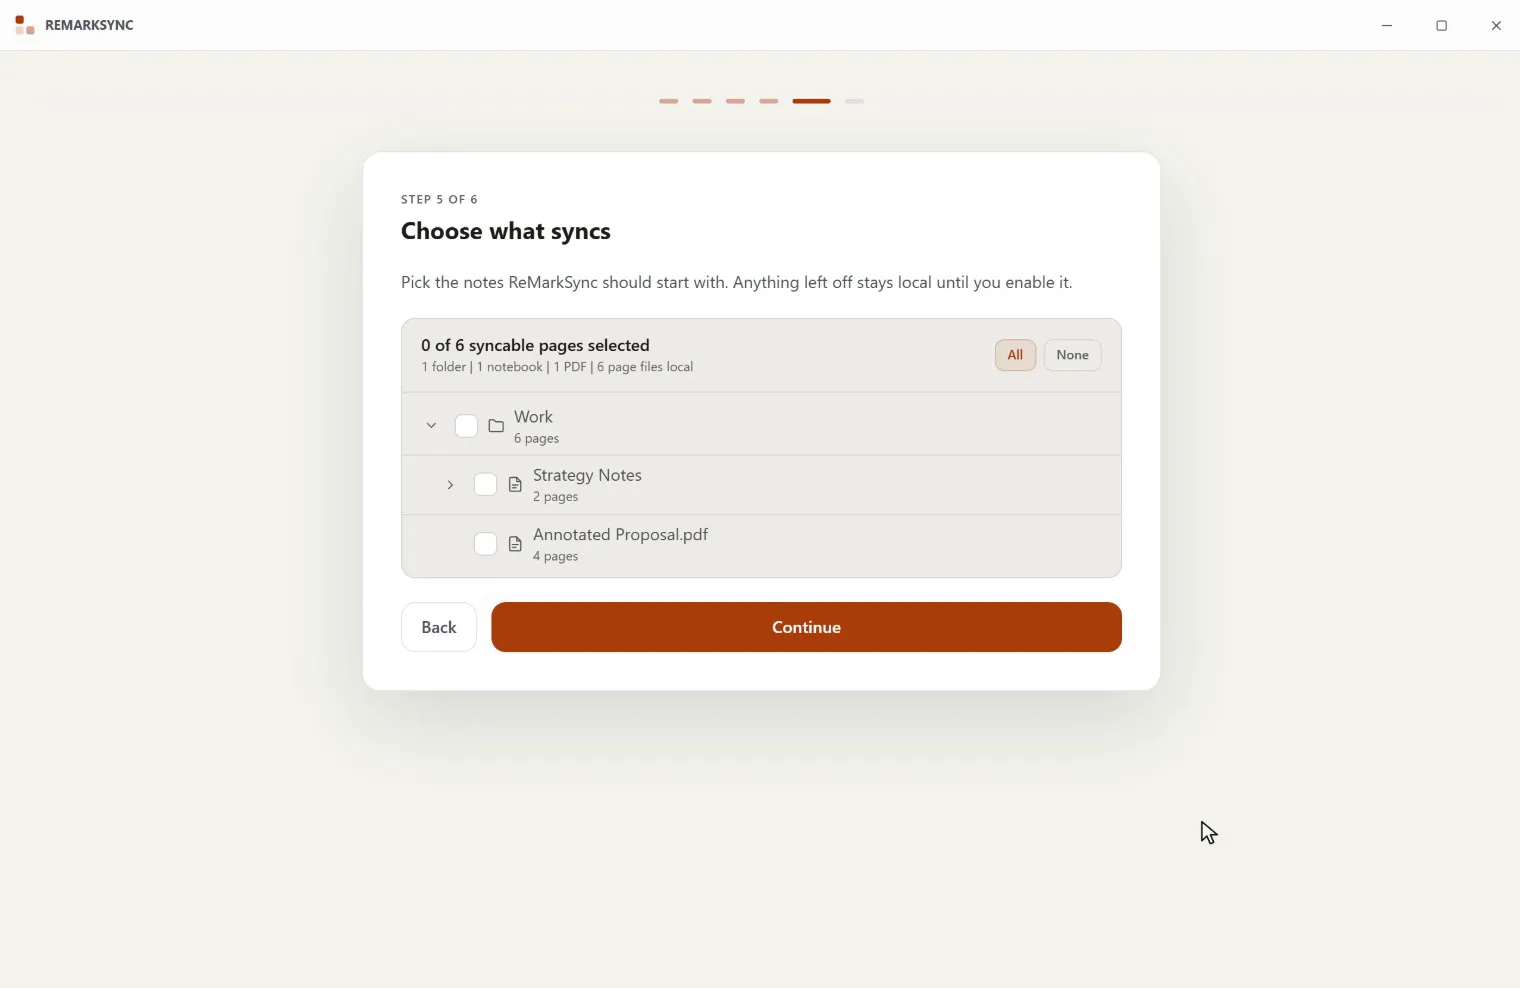
- Select Continue.
Unselected content stays in your reMarkable library and is not sent to OneNote. You can change the selection later in Library.
Include future pages and notebooks
Section titled “Include future pages and notebooks”In Library, selecting a notebook also enables automatic inclusion for its future pages. A folder or All notes selection covers current items; enable its automatic inclusion rule in the row’s More menu to include future notebooks too. Existing unchecked pages and notebooks stay unchecked, and PDFs remain manual.
After an upgrade, your selections remain unchanged and automation stays off until you choose it. See Include new notes automatically for Review notebooks, inherited rules, and exceptions. Clearing a folder’s selection does not switch its Auto rule off; change that setting separately in its menu.
Expected result
Section titled “Expected result”If your screen looks different
Section titled “If your screen looks different”A folder can show a mixed state when only some items inside it are selected. A page may also be listed but unavailable until the official reMarkable desktop app downloads its local page file.