
Manage what syncs from the Library
Outcome: You will update selective sync after setup and send newly selected pages to OneNote.
Before you begin
Section titled “Before you begin”- Complete guided setup.
- Let the official reMarkable desktop app finish downloading recent changes.
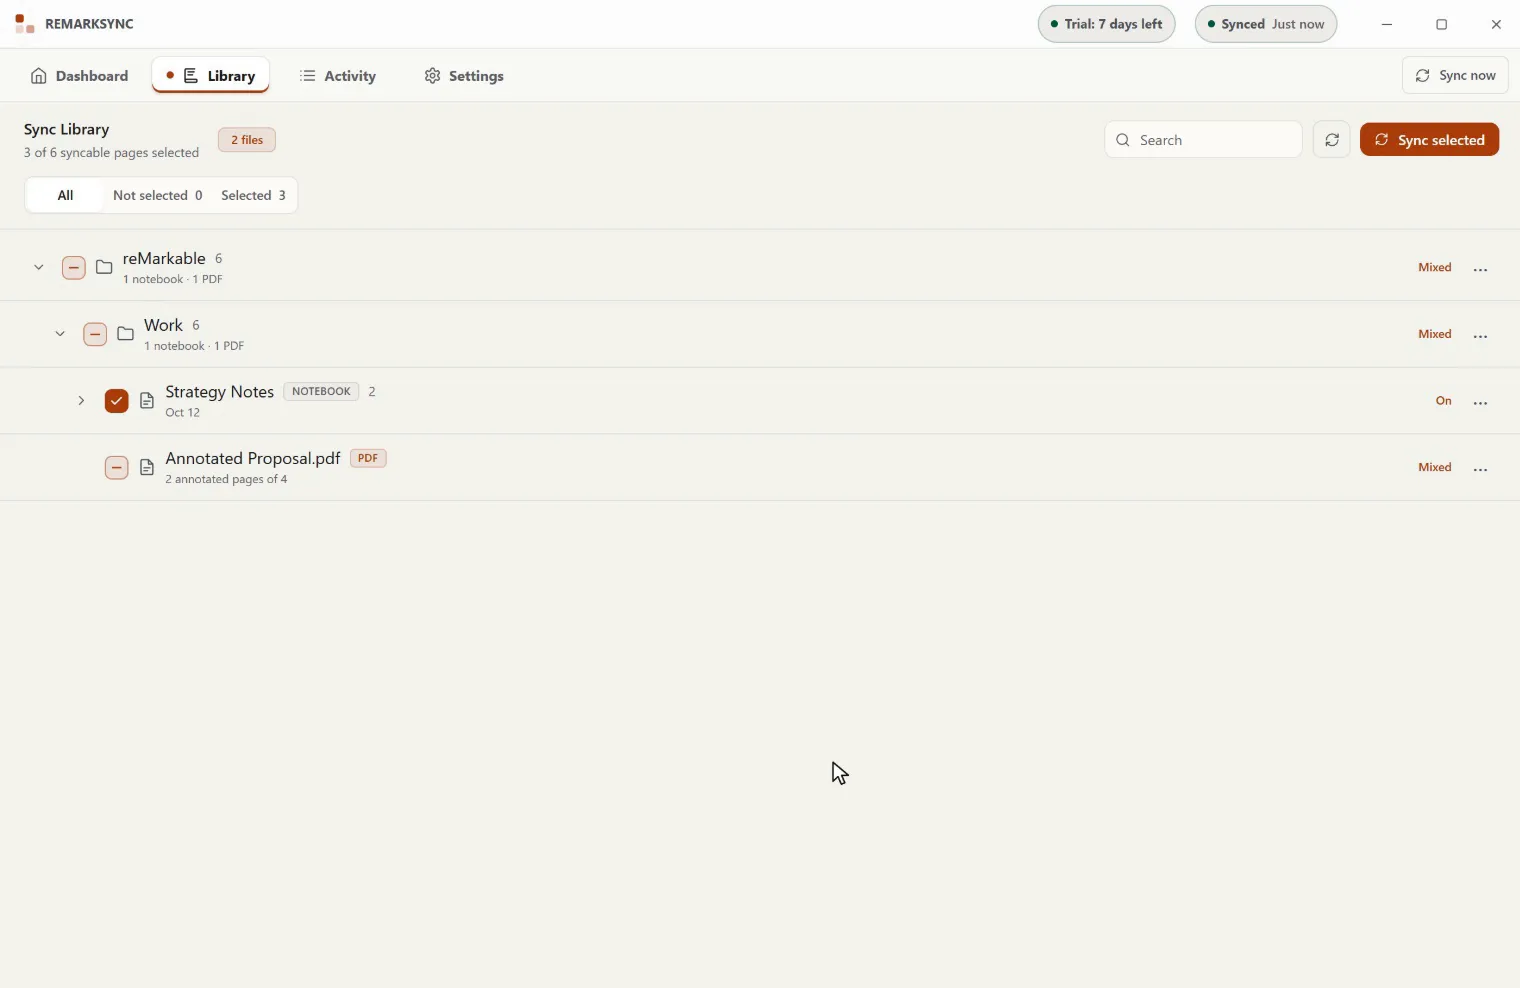
Change the selection
Section titled “Change the selection”- Open the Library tab.
- Use Search to find a folder, notebook, PDF, or page.
- Expand the relevant row.
- Select the pages you want to sync. Selecting a notebook also turns on Auto for its future pages. Selecting a folder or All notes selects what is available now; use its More menu to include future notebooks too.
- Use the All, Not selected, or Selected filters to narrow the list.
- Review the selected-page count at the top.
- Select Sync selected when you want ReMarkSync to catch up the enabled pages now.
Expected result
Section titled “Expected result”Choose what happens to new notes
Section titled “Choose what happens to new notes”Open a notebook or folder’s More menu to set automatic inclusion to On, Off, or Use parent setting. The All notes menu offers Use default setting, which defaults to Off. An Auto · inherited badge identifies a rule coming from a parent folder.
Turning Auto Off preserves current selections and existing OneNote pages. Unchecking a notebook also stops its Auto behavior, and Undo restores the previous selection and rule. Clearing a folder’s selection does not turn its Auto rule off: use its menu if you also want future notebooks to stay unchecked.
Existing unchecked items stay unchecked when Auto is enabled; PDFs remain manual. Follow Include new notes automatically for the menu walkthrough, upgrade opt-in, and examples of folder exceptions.
If your screen looks different
Section titled “If your screen looks different”The Review items control appears when ReMarkSync finds content that is not selected. A page can also show Not selected or an unavailable-local-file state.